Sunday, December 19, 2010

family is family

recently i've been frequenting a new motor cycle web forum than my usual. nothing against the chopper charles gang but its nice to change the scenery every once in a while. the new site i'm trolling is Thechopperunderground.com. if you've never been on it and this is your kinda thing i suggest you give it a look. lots of cool bikes, very supportive people who aren't harley snobs, purist snobs etc. i posted pictures of my bike and got several compliments and i'm a whore for compliments. so, in honor of my new friends i adorned my electrics bag with the TCU motto.

also, new video i took last weekend of the bike running with normal jetting. didn't want to run unless the choke was shut today so i'm pretty sure a rejet is going to be needed.

Sunday, November 28, 2010

it is finished?


the  question mark is because i don't know what the hell is wrong with it. i put the choke cable on, fixed the coolant leak, replaced the cooling fans with smaller ones that pull fewer amps and sealed my brake caliper and bled it. the bleeder screws i got were all the wrong size and 1 attempt actually blew the threads out of the casting. i tapped the hole with the nearest tap i could find the right size. i still didn't have the right size bleeder so i ran a bolt in there. works fine so i'm going to leave it alone for a while til i get the right size bleeder screw. I went to start the bike and holy shit did it give me troubles! back fired so loud i thought my neighbors were going to call the cops! i spent an hour scratching my head and looking over the fsm, even asked a guy on facebook who knows about these bikes. in the meantime i hooked the bike up to a battery charger because i tried to crank it so many times i know the battery was weak. i've let it charge for about 5 hours and went out for a cigarette and for shits and grins i hit the starter button. fucking started no problems. i'm calling it done.  ITS FINISHED!

11-29 update. still doesnt want to start and idle right. i found a vacuum leak that i will repair this week. hopefully it will start and idle like it did before and i can say with confidence its done. right now its tore down again while i fix a small fuel leak and the aforementioned vacuum leak

12- 4:idle is correct. choke operation is correct. BIKE IS FINISHED!! now just needs license and insurnace.

Saturday, November 20, 2010

back tracking

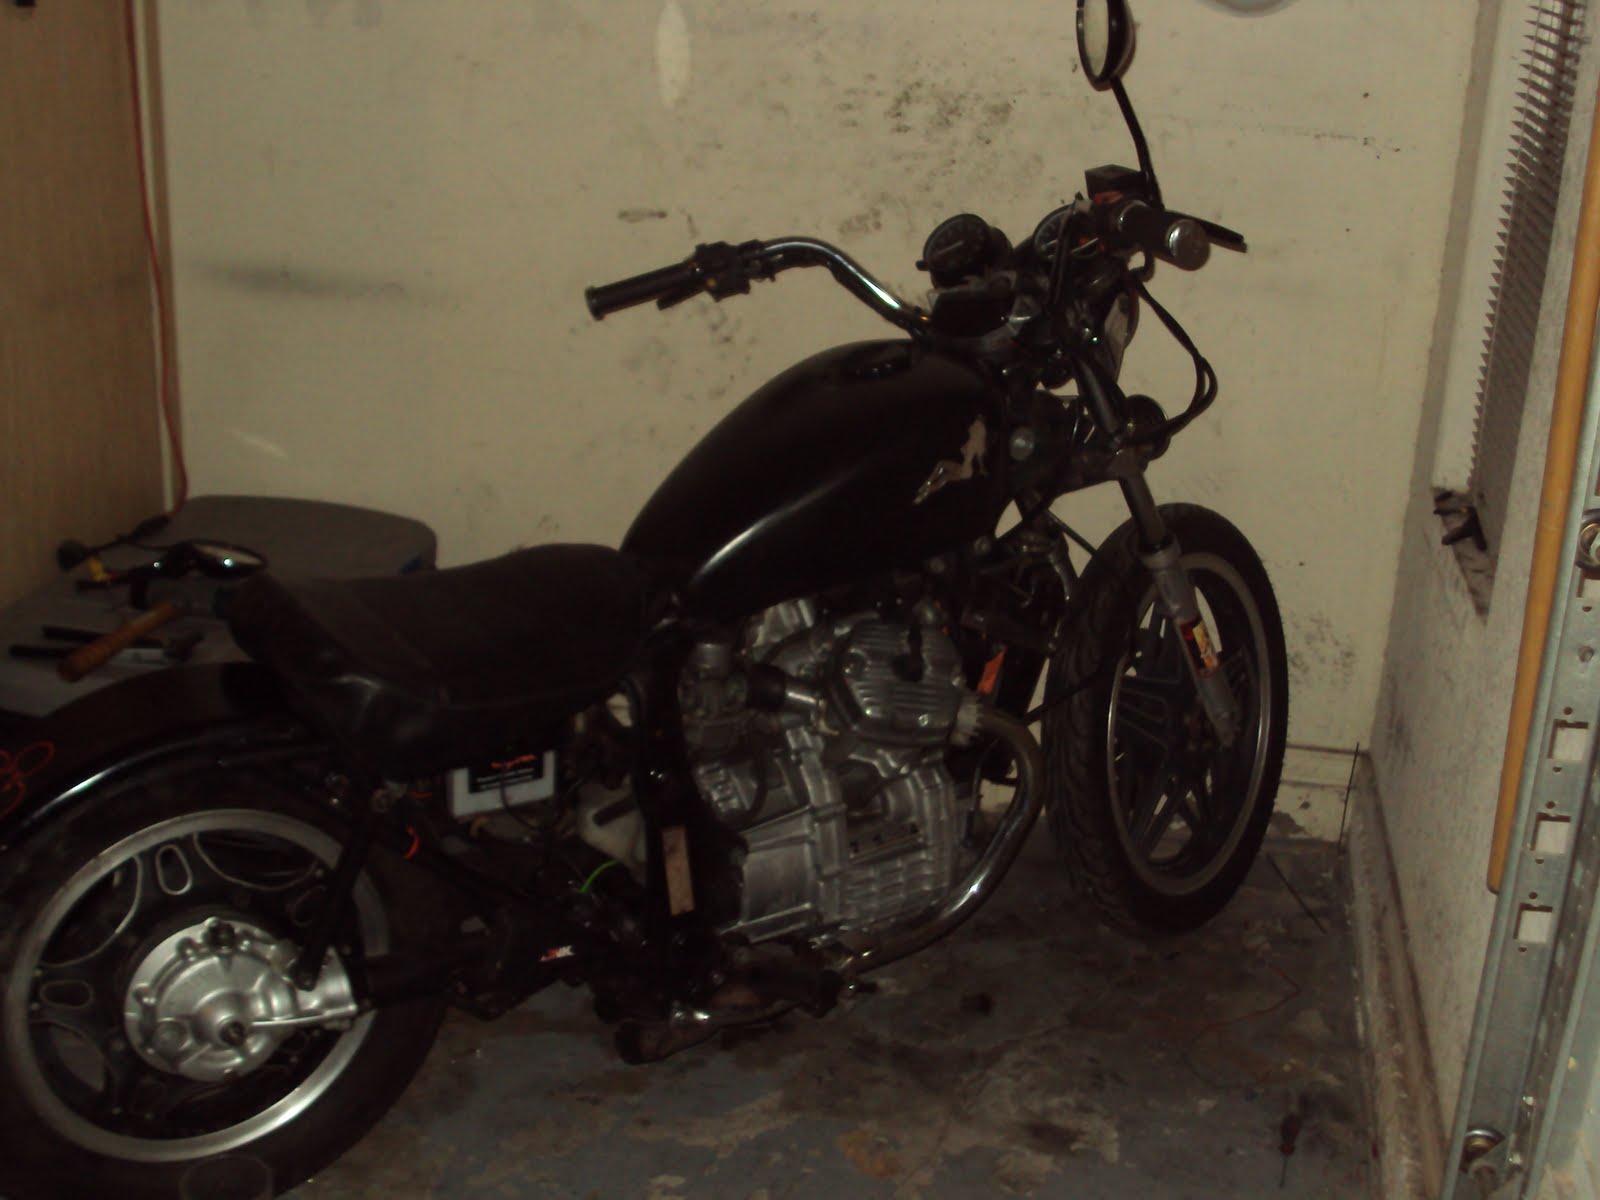
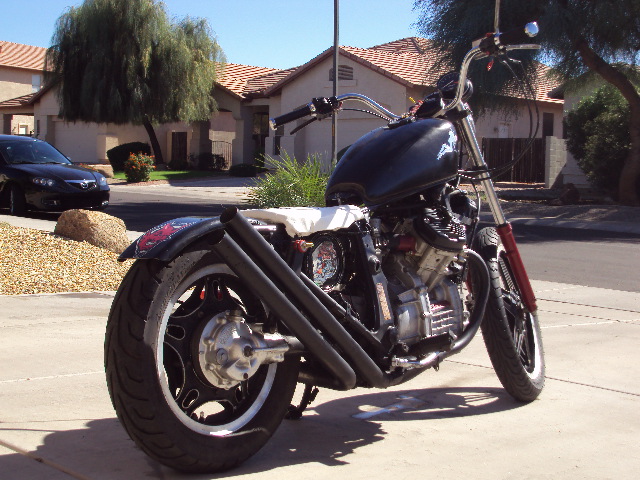
good news, i took the bike for a short test run to check for bugs

bad news, i found a shit load of them. coolant leak, cooling fan draws too much current, fuel started to leak.

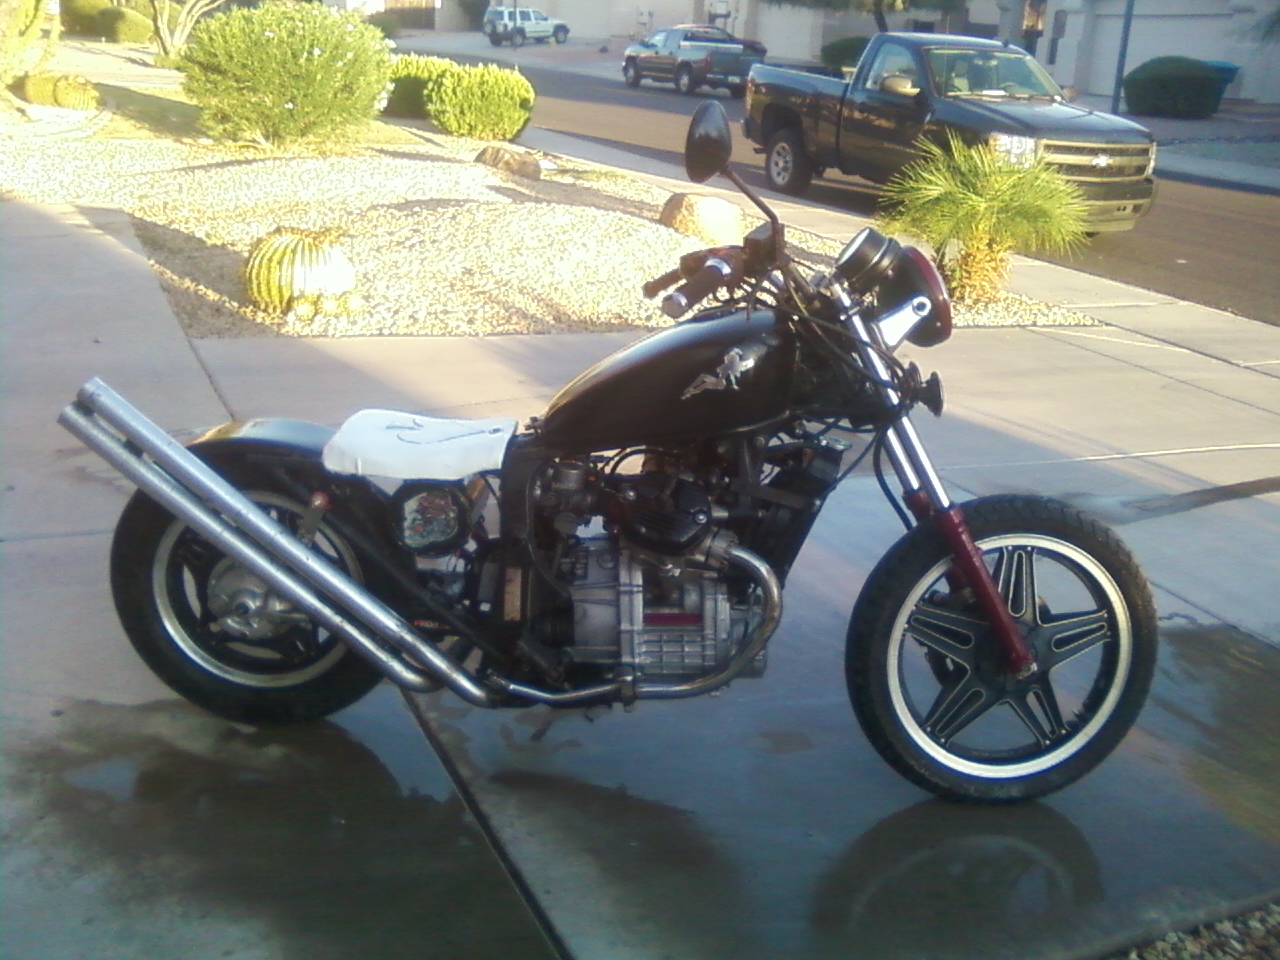
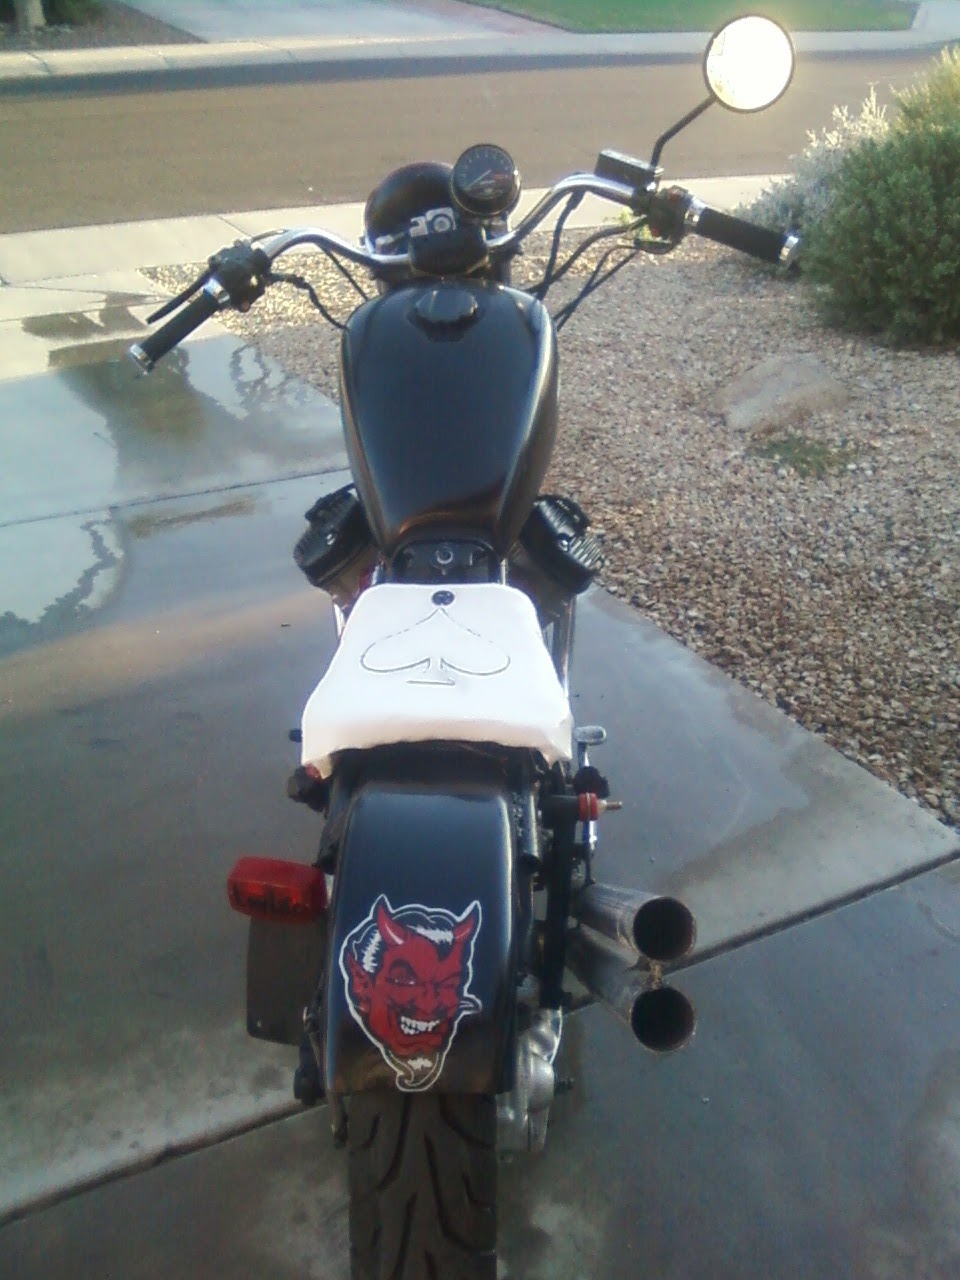
comforting news, bike road good, i didn't drop it, road more comfortably then i thought it would for a hardtail, seat springs absorbed any vibration. bike is loud as a mutha.

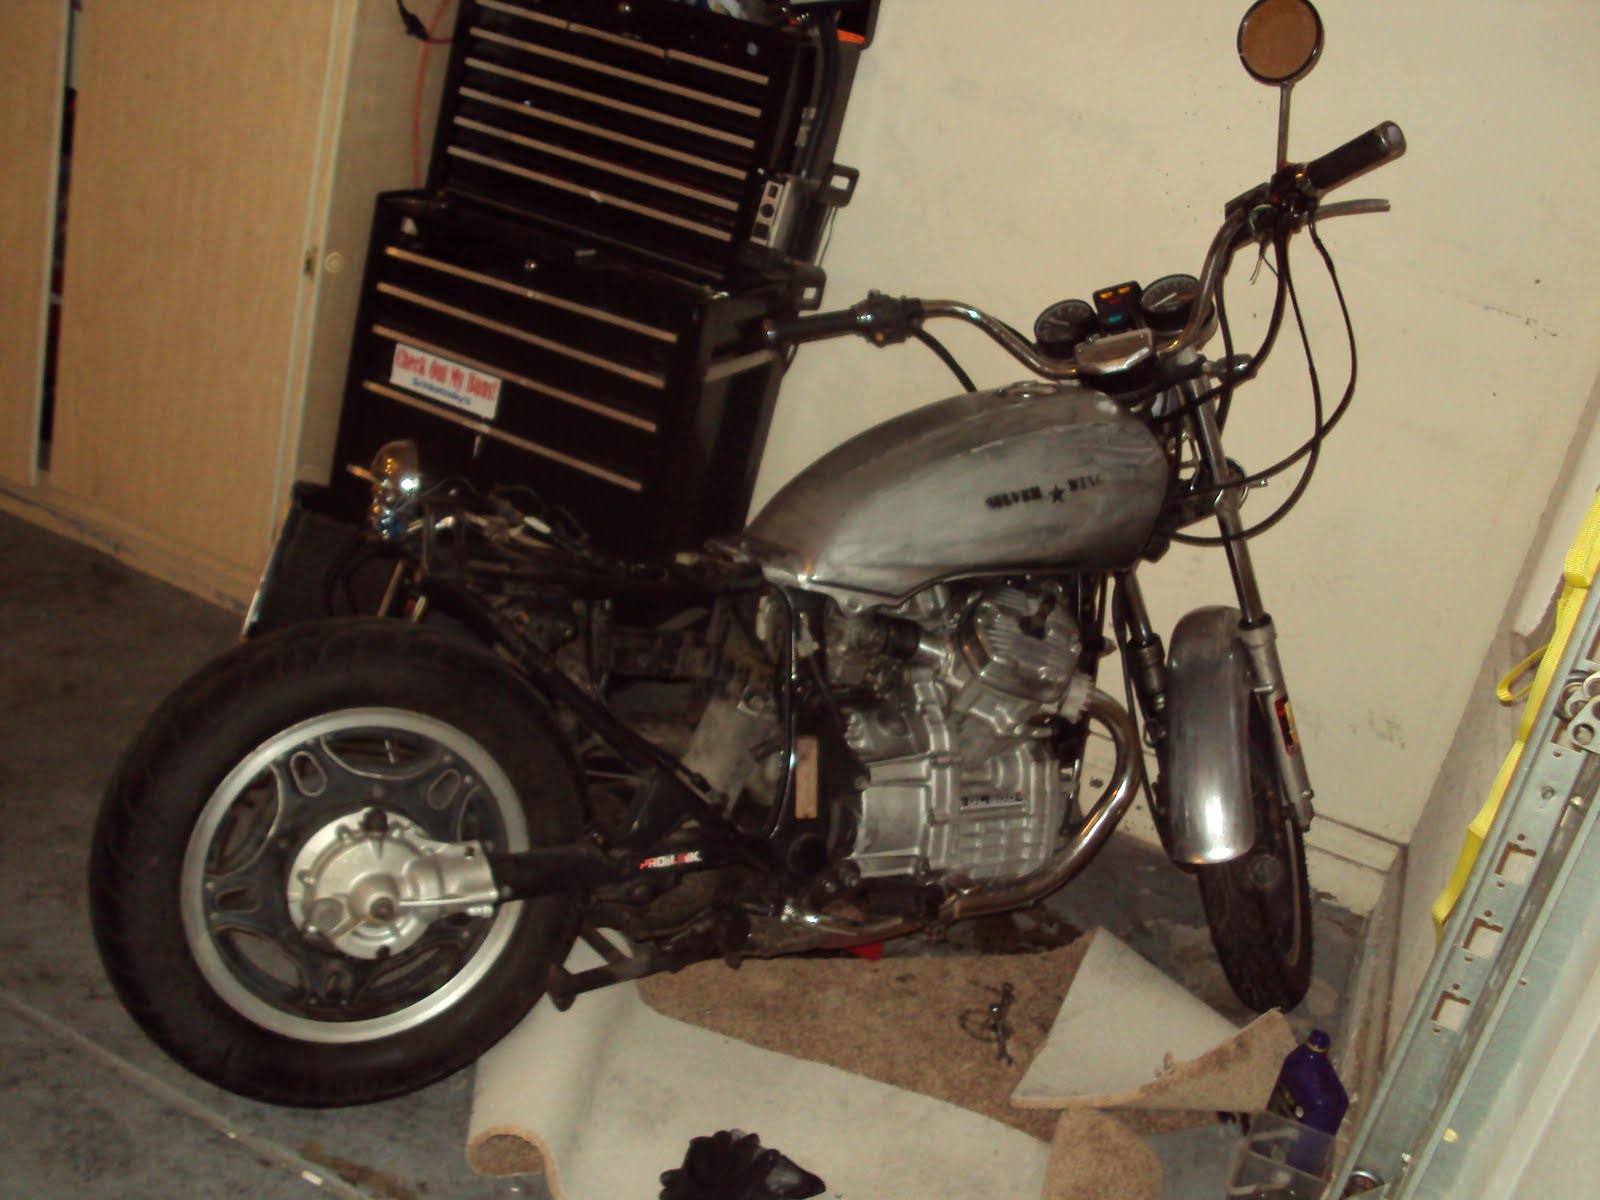
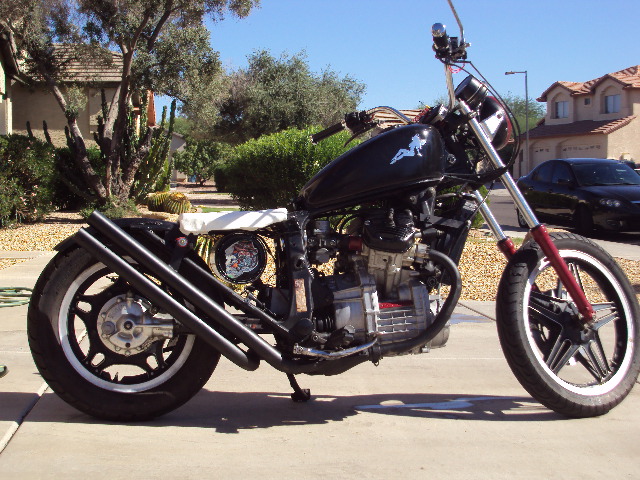
already started to tear down, first order removed the cooling fan. it was built for a honda civic and draws like 8 amps when it kicks on. stalled the bike at idle. i'll scavenge some pc fans out of the old computer i''ve been waiting to part out. that should be less than an amp and still suficently cool the radiator.
next i will deal with the pissing cross over pipes, while the radiator is off i'm going to fix the broken oil pressure light and relocate it and my neutral light to  a more convient location. fuel leaks are gonna suck because the carb is buried in the frame. i was hoping to be done before this coming thursday, my pads are due on tuesday or wednesday. looks like this won't be happening unless i conger up a miracle

Sunday, November 14, 2010

old gremlins

cleaning up the garage today so i moved the bike to the driveway. i've let it run to operating temperature before but never hot enough to get the fan to kick on so i started it up and just let it idle. after about 10 minutes the fan kicked on. then i started to see a drip, further investigation led to the coolant cross over pipes that i thought i had sealed up with the correct o- rings were leaking. i did this back like 6 months ago and i thought all my cooling system issues were behind me. quick venture to the auto parts store came back with red high temp silicone. sealed all the locations that showed a leak and will let it dry for a few days before starting it up again. my biggest fear right now is that i saw the coolant leaking from there and made the leap of faith that it was collecting right near my left side head where it meets the block. i will be royally pissed if i have a head gasket thats leaking. only time will tell.

also i am ordering the last of the parts i need for the front brake so i will have those on by thursday and the horn attached at the same time. if my coolant leaks are solved it will be 99.9% finished. i just have to reattach the viynl on the seat that i pulled loose to attach my seat springs.

Monday, November 8, 2010


I finally got some half way decent pictures and video this weekend. sorry about the sound quality in the video. used a digital camera for video

Sunday, October 31, 2010

Back on track...Nuts to that!

Since the last post i have fixed the starter issue. ground wire wasn't hooked up and i didn't see it. also got the front brake rotor turned (turns out yes you could that) while i had the front wheel off i pulled the old speedo gear and housing becuase i wasn't going to use a speedometer. without the gear and housing the axle had about 1" of lateral movement that meant the wheel would wobble all over the place. i was going to find some axle spacers or cut them or something like that. "Something like that" costs time and money, 2 things i am running out of so i trudged through my odds and ends box and found 2 identical nuts that had an arbor big enough to fit the axle through and together they were exactly 1". free nuts and the ability to get the job done tonight took precedent over making a part that you can't see without a flashlight pretty. would post a picture but you can't see it so no point in trying. just down to rebuilding the front brake system and rehanging the horn. my biggest problem will be keeping my hands off it til i get my parts assembled. i keep fuckin' with things and make more work for myself.

Saturday, October 23, 2010

FUCK...me...running

if anyone read the last post you would see that i said "from a list of things i'm down to two." well that may have been a little over optimistic of me. while i was tearing down the front brake caliper for rebuild i decided to hide my wiring in the bars, while i started prepping for that i wanted to start the bike one last time. fucker wouldn't start. the starter sounded like shit so i pulled it off to count the teeth, they were all there. i couldnt pull it apart because one of the case screws is bent and won't unscrew. i'll  cut it off and put a new one on but when i put the starter back on the bike won't start now. when i turn the key the lights won't even come on. i deduced i lost ground somewhere because the ground locations i used to use don't work anymore but the battery is fully charged up. i was ready to roll this in the drive way and put a road flare in the tank.

Saturday, October 16, 2010

Everything Louder than Everything else.

got the exhaust finished this morning. Danny called me at 830 on a saturday saying he'd be over in 45 min. by 11 the pipes were all welded up and rehung. when i fired it off to hear it with no leaks it actually shot a piece of slag out of the pipe and blew past danny. when i reved it up i aparently hurt his hearing a little bit. I can't thank him enough for helping me with this. i am a novice welder and didn't have the tools at home to make it come out this good. still gotta wrap and paint the pipes but from a list of things i gotta fix before its drivable i'm down to two. gotta make sure it charges itself while driving and gotta make sure it stops. front brakes are next and checking the generator / vr while i wait for parts in the intermin. then. its done. the last post will be a video of 360 view and startup.

Monday, October 11, 2010

Bath Time!

i've owned this bike for almost 10 months and have never washed it. having starting issues right now so i'm dead in the water until i get it figured out so i figured i would roll it in to the drive way and rinse it down.


now i have to figure out why its not starting. i'm thinking the neutral safety switch has an issue. i couldn't get any power to the wire when i probed it on sunday. i'll hot wire the starter and see if i get a grind or not

Sunday, October 10, 2010

why Frisco a tank when you can Motown it?

i realized today after pulling the tank to get to the wiring that i wasnt able to turn the bars all the way before because the triple trees were hitting the lip of the tank at the top. i drained the fuel before so i pulled it off the bike and started playing with where i can mount it to correct this problem. at first i tried to move it back to its stock location. this tank is not OEM for the bike model its a replacement becuase the last one turned into modern art at the sight of a blow torch. this gave me tons of clearnence but,

1.) you could see all the wires i was trying to hide and

2.) there was no way to mount it there because the oem tank didnt bolt thru it just rested on some little tits that stuck out.

so shit... i was frustrated. so i came up with a plan b. the trees were hitting on the pressed lip of the tank at the very front where the top of the tank seams with the bottom of the tank. its meant to give it a definite and finished edge. so fuck that. i laid the tank on the ground and proceded to beat the edge down with a little wooden hammer i got from my dad. its not metal to metal so there were not sparks (fool me once) and its not a rubber or a dead blow so it didn't leave a circular impression. it just rolled the seam under itself and gave the neck of the tank a little tucked in collar. i'm calling it "motowning" a tank because as far as i am aware a "Frisco'd" tank is where the sides are indented. i don't know why its called "Frisco" but I'm calling this style "motown" because i lived in a detroit suburb til i was 14 and i just beat the tank like it owed me money. so thats a copyright right there. snoogins

edit: I finally learned what Frisco'd is... but this tank is still Mo'town'd

Saturday, October 2, 2010

little fixes... big progress

Saturday Night check list...

got the battery hold down bracket welded in place.
re tack welded the exhaust spacers and bracket.
wired the taillight back correctly to the brake pedal.
fixed a gnarly run in the clear on the top of the gas tank.
measured and marked the remaining "vents" for the shotgun exhaust pipes

all in about 2 hours off and on. I realize I blew the 2 week deadline I set for myself but i could drive it tonight if the rain had'nt made the ground all slicked up.

Sunday, September 19, 2010

Perspective

From this...

to this...

Fuck the Porta Power! on to plan B

Tried to use the shops portapower to open up a trapazoidal opening at the base of the swingarm to fit the battery since it no longer fits in the stock location. a fuckin' 10 ton press didn't budge the swing arm. after an hour of screwing with it i started thinking of a cafe' project i saw on the cc board where the battery was laid on its side. i tried it and low and behold the battery now has a permanent home on its side (its a glass mat battery so it won't leak) on top of the swing arm. i shouldn't even call it a swing arm anymore since its modified to a rigid. i bent up a couple of pieces of 1/8" steel strap to make a cradle to secure the battery to so it won't slide around and i'll finally secure it with an old skool leather strap to hold it to the cradle. i'll hook up the battery and see what happens later. hopefully it starts first try. next weekend i hope to have my co worker "frenemy" come over and help me make the exhaust. then it will be 99.9% finished. i still need a front brake light switch, i wanna ditch the speedo and run off the tac only and i may have to rake it out to get the trail correct for optimum ride

Sunday, September 12, 2010

new mod... no pictures

started making a new mod for the bike yesterday. i'm not going to post any pictures of it until the bike is all finished. after this mod there is another, then exhaust and the brake light switch. if all goes well i should be done in 2 weeks. no new posts until the bike is 100% complete.

edit: i realize i just posted pictures 9/19, whatever its my blog and i'll break my own rules. 

Sunday, September 5, 2010

A seat Liberace' would be proud of


remade my seat today. cut down most of the padding and smoothed it out at work. was deciding whether or not to use black or white viynl. I went with white and think it looks pretty good. its definetly old skool and i'm not fully finished. i have another piece to add to give it some dimension but overall I'm happy with it.

Friday, September 3, 2010

front suspension is DONE!.

got the front forks mounted today. put everything back together. holds fluid great. not holding air tight. i think i got a leak in the fill ports. painting of the forks turned out great. the brake pad needs to be adjusted cuz i can hear it scrape. fucking brake light switch was the wrong one and since it was a special order i can't return it. may not end up running a switch for it since the rear one works just fine. few more tweeks and it'll be all done. still need exhaust, fix the aformentioned air leak and brake pad adjust cut off a few no longer used brackets, burn 1 weld in and finish my seat modification i started today. not bad for 8 months and 800 bucks


Thursday, September 2, 2010

its official.

I am almost out of things to fix on this bike.

cooling system- torn down and reassembled

fuel system- new fuel tank, petcock, carb rejet and rebuilt

new bars, rear suspension modified

seat has been repaired. may be replaced with a springer

new cables for gauges

complete repaint

new rear fender got rid of the front fender

lights and electrical system completely rewired

fab license plate mount and brake light

now i just have to figure you how i managed to do all that for 400 bucks

Saturday, August 28, 2010

fuck

the only thing i hate more than carbuerators is hydraulics. so naturally i'm rebuilding the front forks. the snap rings did exactly what you would expect them to do. they snapped because the dust boots did little to stop moisture from rusting them solid. fork oil has a very distinctive smell. i've spent the last 2 days having to say "don't worry, nothing is burning"


FML

Thursday, August 19, 2010

At least i didn't break my neck

took it for a drive today, cooling system all hooked up and leak free, fuel system all hooked up and leak free. front brake needs bled and a front brake switch, rear one works fine. I started it up let it warm up and figured what the hell, so i kicked it into first and started a little cruise. it was alot of fun. it was hella fast, louder than i expected but alot more comfortable than i thought it would be. I'll have to change the bars for something with a more comfortable position, I was a little extended and was a little awkard, but it runs! now i just gotta finish some of the little safety items, insure it and license both the bike and myself. I have attached a full array of pictures to demonstrate the crazy shit that i have done to make this project work for a grand total of $372.00 not including the $400 I spent for the bike


Monday, August 2, 2010

Well theirs your problem(s)

if you are reading this and just want a quick update. bike runs at the right idle now.
to see what it took read on.
got my new air/fuel jets today. installed them. still idled high. already tried pulling off the throttle cables. still idled high. pulled the carbs off and found that one side, was in fact, jammed open slightly. adjusted correctly, still idled high. found the idle adjustment screw jammed in the wrong spot. fixed that. put it all back together and started it. idled at 800, small bump, got to 1100 and stayed there. victory is mine

Thursday, July 29, 2010

Waiting for UPS sucks a fat one!

i'm on hold until the parts i ordered from the dealer show up. I fixed my seat in the few spots it was splitting (special water proof black tape from work and good ol' fashion duct tape). Started fuckin' with my throttle cables cuz I'm sure they were jamming and sticking the throttle. cable is broken at the mount, cable still in tact but the sheathing around it is peeled off so it hangs up. about 6 wraps with electrical tape still not keeping it in place. without the air/fuel screws the bike runs so rich it won't start unless i induce a vacuum leak so large it goes real lean. looking at a bike in the garage that i can't do anything with is so boring. not even worth taking a picture of

Thursday, July 22, 2010

Macguyver FTW

last night my fuel petcock broke in my hand while the tank was full of gas. was able to collect almost all the fuel in the can it came out of. took it to work today and with a combination of some fuel hose and some clamps, its fixed. instead of a nut holding the petcock on its a 1/2" fuel hose and then out to the fuel filter and into the motor. passed all leak tests so far and when i get a battery installed I should be in business

Wednesday, July 21, 2010

Startin' a club... you in?

Yesterday I took stock of how much I have spent on this project. less than a grand INCLUDING the inital bike purchase. to a cheap ass like me thats pretty fuckin' sweet. some of the people i know with bikes have spent more in gas than what i have spent on the whole bike. case in point. a co worker of mine just opened a bar they are calling "RUB" which stands for Rich Urban Bikers. this is almost a paradox in my eyes. When i think of "bikers" i think of Brando in "The Wild One" or Fonda and Hopper in "Easy Rider" not these yuppie motherfuckers that spend 30k on a bike, 2k on riding gear etc. so my club is P.U.B. Poor Urban Bikers. I don't even care if I'm a club of one. I'm an anarchist. I don't need followers. New clubs first motto "no chrome, no cash, no class"
So yeah THIS just happened.

Damnit

After some dicking around I realized that if I wanted to start the bike I would have to put fuel in the tank. I got a 2 gallon can full of gas. poured it in... and watched it pout out the bottom. started to leak on the garage floor. tried to tighten it and it started leaking worse. pushed the bike into the driveway and tried to tighten it again. the fuckin' fuel petcock snapped right in my hand, so i went from a leak to a pour. bobby grabbed the fuel can and stuck it underneath the flow to catch it (why waste 6 bucks) after that little disaster I rigged up an iv to see if after my carb rebuild i can even get the bike to start. took a 1 liter pop bottle cut the bottom off, punched a hole in the cap and shoved the fuel hose in. poured about 3 cups into my makeshift iv and try to start the bike. now, turns out the battery is dead... again. i have to charge this battery what seems like weekly and it only last for a few cranks. since i was out in the sun i could get a good look at the battery. the date code punched on the top tells me it was manufactured over 2 years ago, i only bought it 7 months ago. this battery has been shit this whole time and i have been chasing fucked up starters and faulty wiring that is not. gotta verify tomorrow with better equipment but god damnit today was frustrating!

Tuesday, July 13, 2010

Making your Own Decals

Got some special paper from Staples. its matte white with an adhesive back on it. Ran it thru my printer at work as a proof of concept. turned out pretty good. So I made larger ones at home. stuck them to my covers and started laying down the clear coat. Here is some pictures after 2 coats of clear.

Monday, July 12, 2010

...meh

I finished the other side cover today. it sucks that i spent all that time to get a finished product that i am... underwhelmed by? they do the job. they cover the electronics and intake but the left side cover had to be trimmed to clear the license plate bracket and taillight. I trimmed off a section with the dremmel and punch a slit for the strap to attach. i'll have to get some more straps for the angled frame section to secure both sides down so they don't flap up while I'm driving. Hopefully when i add the decals to the covers I will like them more. have a look.


Thursday, July 8, 2010

how to turn a nerf side cover into an asphalt one


The individual picture on the left is a "before" I fiberglassed the cover. the picture on the right is the "after" actually i re made the drivers side one after it de laminated and the right one just needs a some more sanding and a bondo smoothing. after it was fiberglassed it felt, looked and kinda smelled like asphalt. the weird thing is its really strong but pretty flexible. i put it on the bike and the top conformed to the sides. drivers side will get glassed tomorrow and sanded on Saturday. should have them finished and installed by Monday

Tuesday, July 6, 2010

side covers made by nerf

so I'm fiberglassing my side covers right now. they have been splashed with resin/hardner mixture and are sitting out side drying now. good thing to know. if the resin/hardner mixture is mixed a certain way it generates it own heat. and alot of it. instead of covering them with glass mat i just wrapped them in this carpet and coated them. i'll bring them in in the morning and see if they are even any good. i torched my lungs, burnt my fingers and have resin on my arm hair... but it beats the shit out of spending 50 bucks per side for a set of new ones at the junk yard...
cheers


update; 7/7: after letting them dry all last night and this morning after lunch at work i started checking them out. turns out the resin/hardener or the 110+ heat caused the mat to seperate from the aluminum. it still hardened but a good thress inches from the original form. it only did it on one of the covers. one turned out damn near perfect.i'll post a picture tonight. i have already sanded it and will bondo it in the morning.

Sunday, July 4, 2010

Ghetto Fab-ulous


a few months ago i made some side covers and planned to fiberglass them... turns out i don't know shit about fiberglass. in my attempt to learn to fiberglass i ruined my forms. I had long gotten rid of my templates for them and had to start from scratch and make some new ones. I took some paper thin aluminum to reform new side covers. now i'll either retry my hand at fiberglassing or ask a friend at work to do it for me. heres what the right side looks like. hence the title "Ghetto Fab-ulous"

Tuesday, June 29, 2010

finally, something went my way today.

In previous iterations, i was using a glowing skull as a brake light, you know the kind people use as hitch covers on trucks. a few weeks ago it finally gave up, the mounting screws wallered out and it was too much of a pain in the ass to keep using it. so i went to pep boys and got an honest to goodness taillight. granted it was for a trailer. I just got done wiring it up and it looks better than the skull ever could have. more of a classic bobber look that ultimately i wanted. still got to tie up the wiring and adjust the brake light switch to work when the pedal is only partially depressed but its 110 degrees and i don't have any air conditioning in the garage.

Sunday, June 27, 2010

new tank, new direction

After my original gas tank came down from the orbit the contained explosion put it in I quickly realized that worrying about silly shit like a dent in the tank was only going to cost me more money. I searched ebay and found a replacement tank for about 20 bucks, worked out an awesome deal through work for damn near free shipping and started out to make the rattiest rat bike the world has ever seen. This time around i sanded the tank by hand through the clear coat and shot with with about 6 coats of Krylon. then turned my attention to the stance. This Blog is titled Low Life because that is the direction I am sticking with on this bike. Low, loud and unrefined. Kinda like me :) I'm going to skip through the steps I went through to get the bike this far but i'll some it up with a short statement. alot of cutting, drilling, fabbing and welding was needed to take Hondas original design for a low buck street cruiser and make it into this little nightmare.

But here it is now. 6 months later its a shell of its original self. And I'm only 1/2 done.


I'm only really able to work on this bike at nights and on weekend free time. I should have named this "Project flip flops" cuz i'm always wearing sandals when I work on this. I know its not safe but its 110 fuckin degrees in my garage now and I only work on it for 15 minutes at a time. cheers.

Step 1 of 100

The design went through several iterations. Its not like American Chopper where the design is fully thought out before anything else is done. instead, I just started doing what I felt like on the bike. the first thought was to sand the paint down to bare metal, repaint in a metallic finish to make the bike almost look like a delorean, mid way through that i realized that wouldn't fit me so I tried to sand off the wet paint, it left it with a very cool hammered and beaten finish in the metal, so I ran with it and made the bike look like an old hammered army bike.


The bikes design stayed like that for a few weeks until i decided to redo the tank with fresh coat of paint. there was a dent the size of someones palm on the right side of the tank when i bought it and i wanted a fresh start with no dents. I took the tank in to work where I have access to all kinds of tools and various danger. One of my co- workers offered to help me remove the dent. he took the torch and heated up the area. what he forgot to do was check the tank to make sure I cleaned it enough... as the picture below illustrates I didn't clean it out very well at all.

So it was off to buy a new tank

Catching up

it had been so long since i added something to this blog that i forgot i had it. heres the deal 6 months in...


In Late Decmeber I bought a 1981 Honda Gl500 Silverwing off Craigs list for $400.00. I wanted a motorcycle for a long time and since I lack the ability to shit spare change my options were limited. When I found this on Craigs list I knew it was the bike for me. Price was right, size was right and it was so ugly and beaten what ever I did to it I wouldn't feel bad. Below is a picture of the bike a few days before I took delivery